Introduction
Welcome to Module 2 of this course on how to use Kobo Toolbox. In Module 1, we have mentioned that we will only use Kobo Toolbox online in setting up your ODK forms. Thus, it is very important that you have already created your Kobo Toolbox account. If you have not done so, create one here.
A Slidedeck has been created on how you can upload and test your forms using Kobo Toolbox.
People prefer to use the Kobo Collect app using their phones because of mobility and because the forms can be used offline.
It is ideal to use the Kobo Collect app using your phone or tablet if:
- You need to do more than 50 household or field level surveys.
- You have limited access to the Internet, in which case you can save your forms on your phone and submit them when you already have Internet access.
- You have few enumerators and few equipment to use, thus, enumerators can just use their own phones or tablets to do data collection.
Content
- Know the interface
- The FORMS tab
- Uploading your forms
- Testing the form
- Deleting the form
- Replacing the form
- Reminders and tips
Prerequisites
- your Excel form
- your Kobo Toolbox account
- good Internet connection
Know the interface
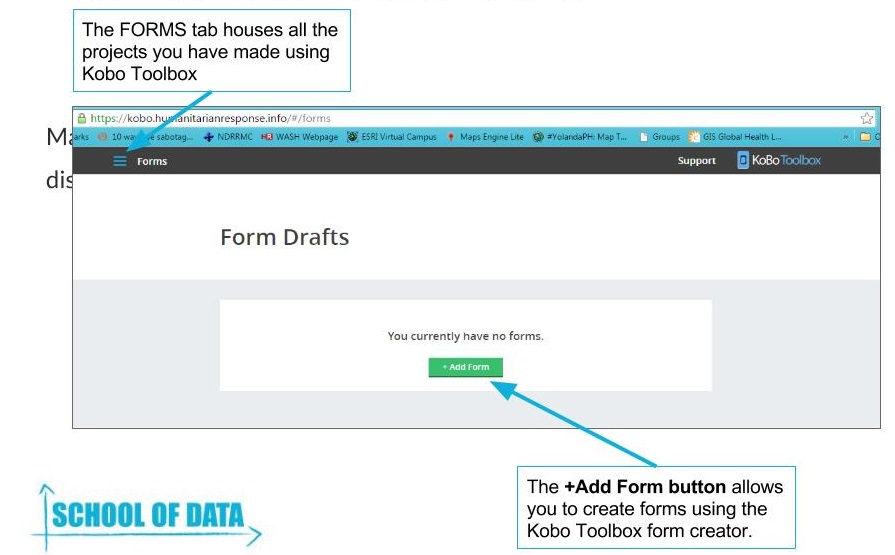
The Kobo Toolbox website will initially show you the form drafts that you have created using the online Kobo Toolbox form creator. However, for this module, we will only focus on the uploading the Excel forms we have previously created.
Once you click the Forms tab, you will see all the forms you have uploaded.
The FORMS tab
The Forms tab will show you:
- Question Library – this is where you can save the usual questions that you are using for the forms you have made using the online form creator.
- Projects – these are the projects or forms you have created both using the online form creator and uploaded Excel forms.
- Settings – this shows your user profile, if you want to include metadata on your account and if you would like to require authentication to view and edit forms.

Uploading your forms
- Click PROJECTS. Here you will see all your uploaded and created projects.
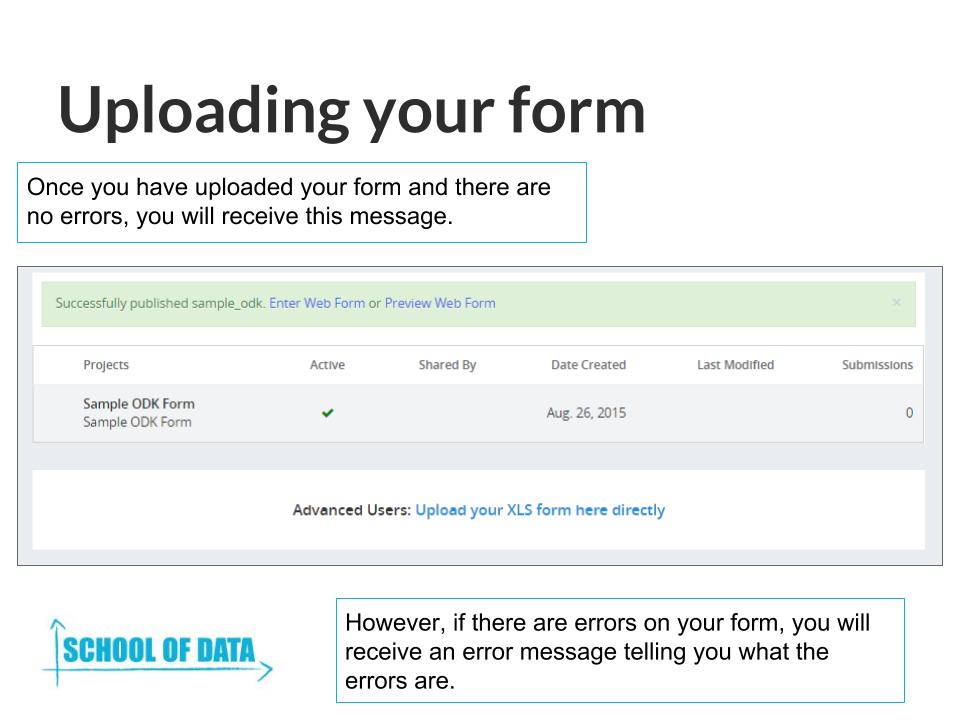
- Click UPLOAD YOUR XLS FORM HERE DIRECTLY. You will be prompted to select the Excel file that you want to use.
- Once you have selected the file, it will automatically upload the form that you want to use.

If there are errors on your Excel form, you will receive an error message telling you what you need to revise on your Excel form. Otherwise, you will get the message Enter Web Form or Preview Web Form.
Testing the Form
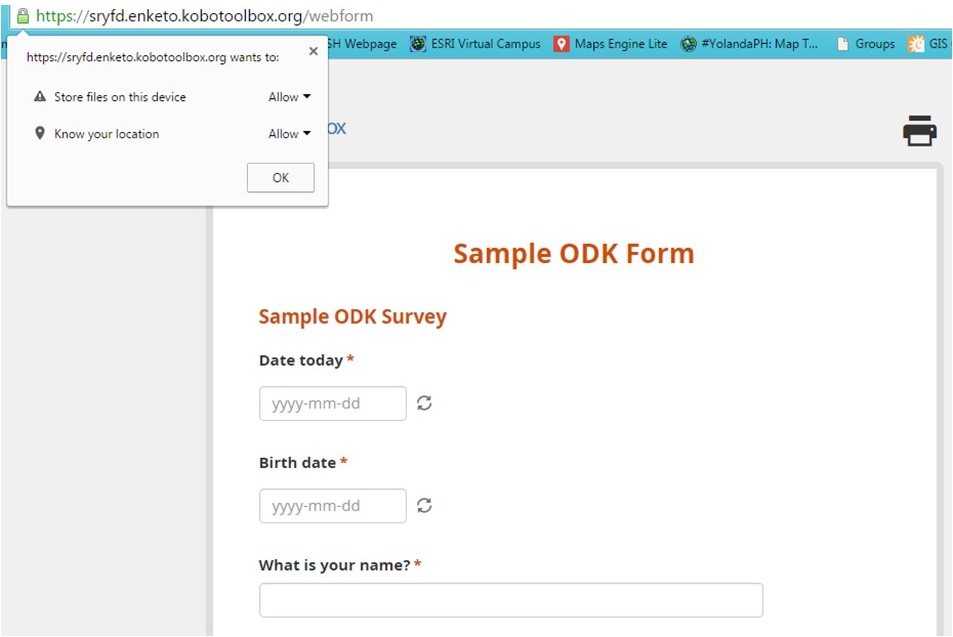
Once you have clicked Enter Web Form or Preview Web Form, you will see the online version of the form. Sometimes, the web form do not look exactly like the mobile version of the form.
The web form will prompt you if you want to store files on your laptop and share your location. When you get errors on the form that you have selected, the form will not be uploaded.
Deleting the form
Sometimes, you will only find errors on your form when you have tested it. When you see these errors, you cannot directly change the form in the web version. You need to delete the project and re-upload the corrected Excel file.
To delete your form, click the project from the project list. When you click the Project Settings, you will see the option to DELETE the project.

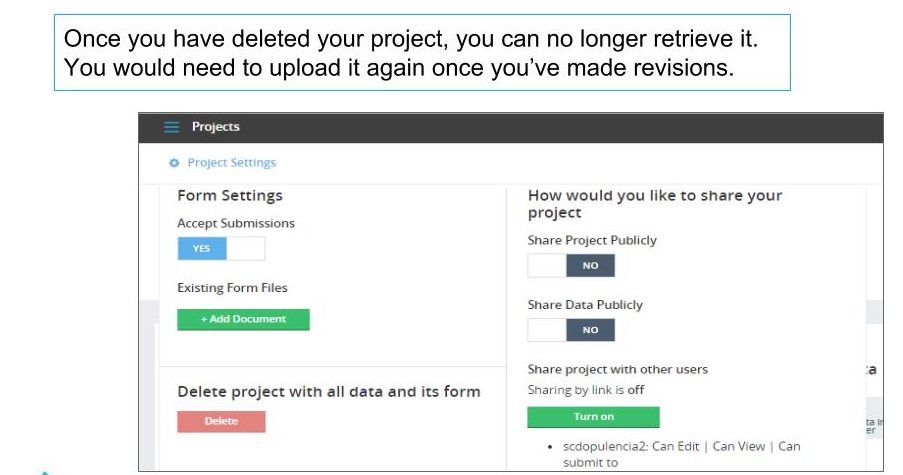
Be very careful in deleting your forms. When data has already been submitted through the form, it will also be deleted once you delete the project.
Replacing the Form
To replace the form, you need to delete the form and follow the steps in Uploading the Form. The new form will appear on your projects page.
Reminders and Tips
- Always save your Excel form in a different file name on your computer.
- Once you have uploaded a form, you cannot upload the same file using the same form_id.
- Keep several versions of your Excel forms on your computer. You’ll never know when a calculation or group questions may become useful.
- Kobo Toolbox will not allow you to revise uploaded Excel forms directly on the site. You would need to delete the project, revise it and upload it again.
When you have successfully uploaded your form, you can now proceed to Module 3 to try the form on your phone or tablet and start collecting data!
Next step: Setting up your form on your Android device
Previous step: Creating your ODK Data collection form