Using OpenRefine to Clean Multiple Documents in the Same Way
When working with data that is published on a monthly basis according to the same template, it is often the case that we need to apply the same data cleaning rules to the data each time a new file is released. This recipe shows to use OpenRefine to create a reusable script for cleaning data files that get published month on month according to the same schedule.
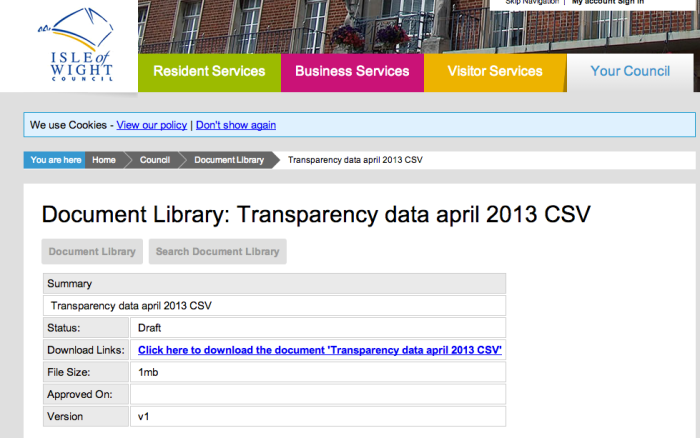
To make things a little more concrete, consider this example. Under UK transparency regulations, local councils publish spending data for amounts over £500 on a monthly basis:
To get to the actual download link for the CSV data files requires another click… (example CSV file, if you want to play along…;-)
If we want to get this data into a site such as OpenSpending.org, we need to do a little bit of tidying of the data to get it into the format that OpenSpending expects (see for example The OpenSpending data format). As each new file is released, we need to to clean it as we have cleaned the files before. If you are a confident programmer, you could write a script to handle this process. But what can the rest of us to to try to automate this process and make life a little easier.
One way is to use OpenRefine’s ability to “replay” cleaning scripts that you have generated before. Here’s an example of how to do just that…
Let’s start by loading the data in from a CSV file on the Isle of Wight local council website – we need to copy the download link URL ourselves:
The recent spending files are in a common format (that is, they have been published according to the same template), which is something we’ll be relying on, so we could load multiple files in at once into one big data file, but in this case I’m going to take each file separately.
OpenRefine makes a good guess at the file format. One minor tweak we might make is to ignore any blank lines (OpenSpending doesn’t like blank lines!).
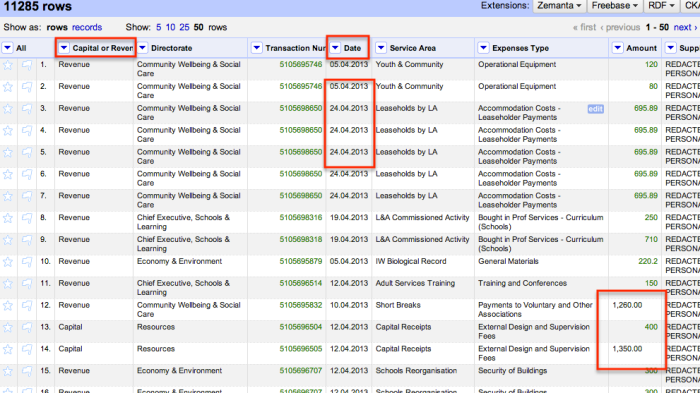
Here’s what the data looks like once we import it:
OpenSpending expects the data to be presented in a particular way, which is why we need to clean the data a little before we can upload it. For example, OpenSpending likes column names that are free of spaces and punctuation; it requires an amount column that just contains numbers (so no commas in the number to make it more readable!); it requires dates in the format 2013-07-15 (that is, the yyyy-mm-dd format) (and I think it needs this column to be called time?).
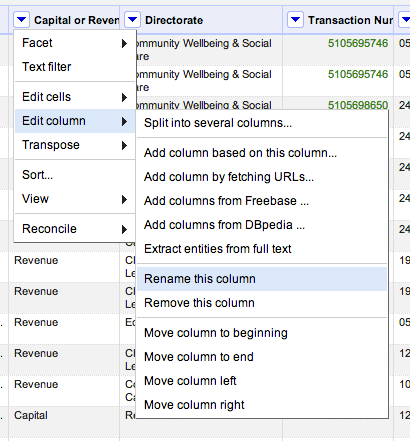
Here’s how we can rename the columns:
Rename each column in turn, as required – for example, remove any punctuation, use camelCase (removeing spaces and using capital letters to make work boundaries), or replace spaces with underscores (_).
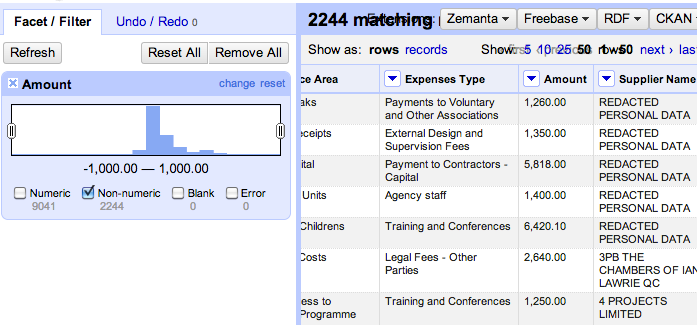
Let’s look at the amount column – if we select the numeric facet we can see there are lots of things not identified as numbers:
We can preview what the non-numeric values are so we can set about tidying them up…
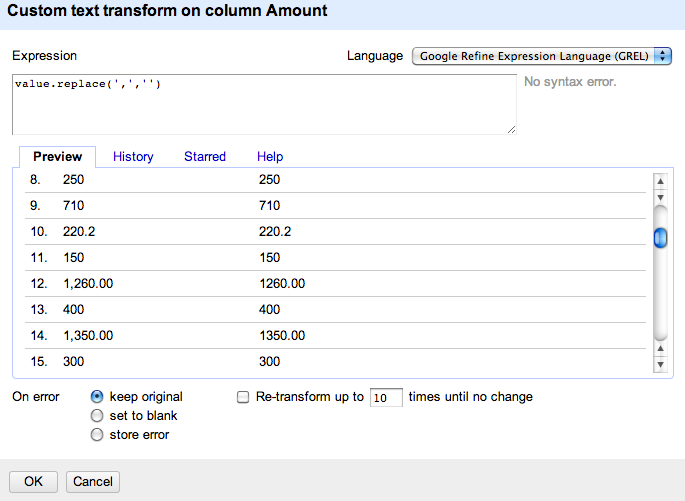
So commas appear to be the major issue – let’s remove them by transforming cells in that column that contain a comma by removing the comma.
We can do this by replacing a comma whenever we see one with nothing (that is, an empty character string) – value.replace(',','')
Let’s see what effect that has on the numeric facet view:
Well that seems to have worked – no non-numerics any more… (We might also use the sliders in the numeric facet to check the outlying values to see if they are plausible, or look like they may be errors.)
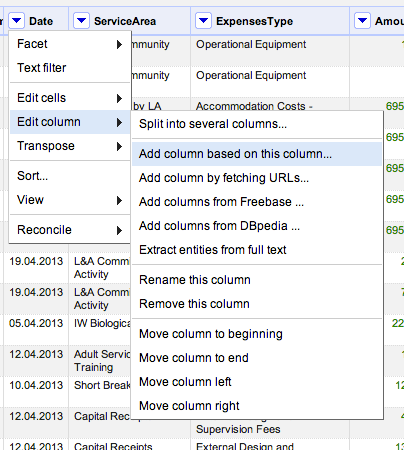
As far as a the dates go, we have dates in the form 17.04.2013 rather than 2013-04-17 so let’s transform them into the required format. However, because there is more scope for things going wrong with this transformation, let’s put the transformed data into a new column:
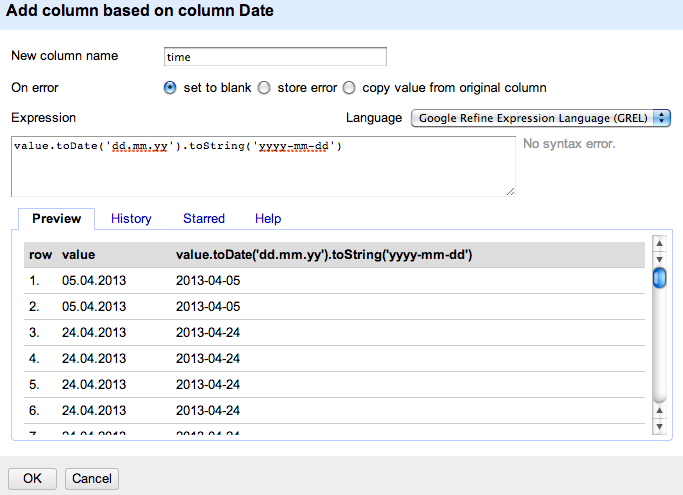
Here’s how we define the contents of that column:
That is: value.toDate('dd.mm.yy').toString('yyyy-mm-dd')
The first part – value.toDate('dd.mm.yy') interprets the string as a date presented in a given format, and then transforms that data into the rewquired date format: .toString('yyyy-mm-dd')
We can quickly preview that this step has worked by transforming the column to a date type:
and then preview it using a timeline facet to check that all seems in order.
(If there were non-date or error elements, we could select them and look at the original date and transformed date to see where the problem may lie.)
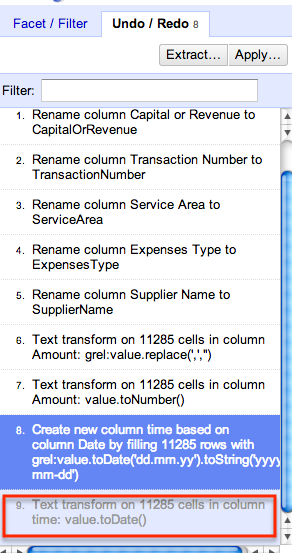
We don’t want the date formatting for out OpenSpending data file, so we can undo the step that transformed the data into the timeline viewable date format:
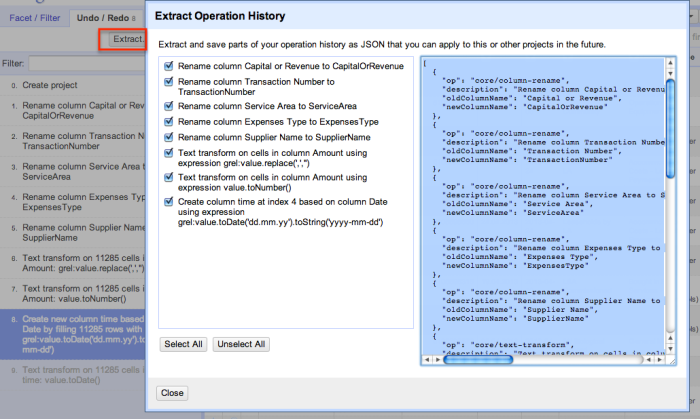
So now we have our cleaned data file. How can we apply the same steps to another month? If you look at the history tab, you will see it offers an “Extract” option – this provides a history of the change operations we applied to the dataset.
If we copy this history to a text file somewhere, we can then make use of it again and again.
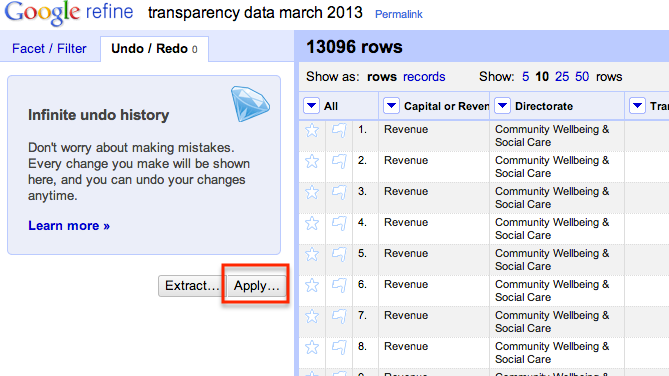
To see how, open another OpenRefine project and import the data for another month (such as this one). When you have created the project, click on the Undo/Redo history tab and select Apply:
Paste in the transformation script we grabbed from the previous project:
Here’s the script I used – https://gist.github.com/psychemedia/6087946
When we apply the script, the data is cleaned using the same operations as previously:
That is, as long as the new data file is in the same format as the previous one, and only requires the same cleaning operations, we don’t really have much to do – we can just reuse the script we generated the first time we cleaned a file of this type. And each time a new file is published, we have a quick recipe for cleaning it up so we can get it into OpenSpending:-)
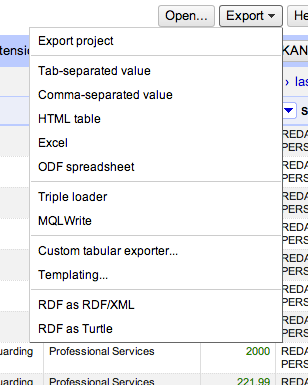
Finally, we can export the data for use as required…
Magic:-)


